intro
If you want to secure your Elasticsearch cluster, you may use Shield (X-Pack component) , however, in order to use it, you need to pay 🙁
Another solution can be used in order to secure your Elasticsearch cluster “for free” 😀 ==> Search guard
Search guard offers the possibility to secure your Elasticsearch for free ! however, some features are NOT ! so you need to pay for a licence if you want for instance to implement active directory/LDAP based authentication.
You can check search guard site in order to get an idea of which features are free for use in a production environment : https://search-guard.com/product/
In this blog post, I will try to explain how to secure your Elasticsearch cluster with a basic authentication mechanism.
First, you need an Elasticsearch cluster up/running. You can check my previous blog in order to set one : https://mhichri.com/index.php/2018/02/18/setup-a-prod-elasticsearch-instance-on-aws-ec2-server/
setup
First of all, make sure that you have JAVA and OPENSSL installed on your server
1- install searchguard plugin for elasticsearch :
./bin/elasticsearch-plugin install -b com.floragunn:search-guard-6:6.5.4-24.0
in order to check if the searchguard is correctly installed, you should find a folder called « search-guard-6 » inside your elasticsearch_path/plugins. For instance :
[admin@localhost plugins]$ pwd
/home/admin/elasticsearch/elasticsearch-6.5.4/plugins
[admin@localhost plugins]$ ll
total 8
drwxr-xr-x. 4 admin admin 4096 6 janv. 18:49 search-guard-6
[admin@localhost plugins]$
2 – then, you need to generate the keystore/trustore files. In this example, we will use the example file provided by searchguard (not for production use).
2.1 – Download :
wget https://github.com/floragunncom/search-guard-ssl/archive/es-6.0.0.zip
unzip es-6.0.0.zip
cd search-guard-ssl-es-6.0.0/
cd example-pki-scripts
2.2 – we will then edit the example.sh file :
cp example.sh example.sh.old
cat example.sh ⇒
#!/bin/bash
OPENSSL_VER=”$(openssl version)”
if [[ $OPENSSL_VER == *”0.9″* ]]; then
echo “Your OpenSSL version is too old: $OPENSSL_VER”
echo “Please install version 1.0.1 or later”
exit -1
else
echo “Your OpenSSL version is: $OPENSSL_VER”
fi
set -e
#./clean.sh
./gen_root_ca.sh capass changeit
./gen_node_cert.sh node1 changeit capass
#./gen_node_cert.sh 1 changeit capass
#./gen_node_cert.sh 2 changeit capass
#./gen_revoked_cert_openssl.sh “/CN=revoked.example.com/OU=SSL/O=Test/L=Test/C=DE” “revoked.example.com” “revoked” changeit capass
#./gen_node_cert_openssl.sh “/CN=es-node.example.com/OU=SSL/O=Test/L=Test/C=DE” “es-node.example.com” “es-node” changeit capass
#./gen_node_cert_openssl.sh “/CN=node-4.example.com/OU=SSL/O=Test/L=Test/C=DE” “node-4.example.com” “node-4” changeit capass
./gen_client_node_cert.sh admin_es changeit capass
#./gen_client_node_cert.sh kirk changeit capass
#./gen_client_node_cert.sh logstash changeit capass
#./gen_client_node_cert.sh filebeat changeit capass
#./gen_client_node_cert.sh kibana changeit capass
#./gen_client_node_cert.sh sgadmin changeit capass
#rm -f ./*tmp*
⇒ here we left the line where we will generate a Certification Authority (CA)
⇒ we left also the line where we generate a keystore for the elasticsearch node named « node1 » .
⇒ we left the line where we generate a client certificate in order to use it as an admin certificate (mandatory in order to update searchguard configuration. PS : you cannot use the node certificate as an admin certificate)
2.3 – then , we will edit also the file « gen_node_cert .sh» :
[admin@localhost example-pki-scripts]$ diff gen_node_cert.sh gen_node_cert.sh.old
10c10
< NODE_NAME=$1
—
> NODE_NAME=node-$1
so here, we will only change NODE_NAME=$1 instead of node-$1
make sure that you’re using the correct node name (already setted in you conf/elasticsearch.yml file) :
node.name: node1
2.4 – run ./example.sh
you should have these files created :
[admin@localhost example-pki-scripts]$ pwd
/home/admin/elasticsearch/search-guard-ssl-es-6.0.0/example-pki-scripts
[admin@localhost example-pki-scripts]$ ls -rtlh
total 76K
-rwxr-xr-x. 1 admin admin 2,0K 24 nov. 2017 gen_root_ca.sh
-rwxr-xr-x. 1 admin admin 2,1K 24 nov. 2017 gen_revoked_cert_openssl.sh
-rwxr-xr-x. 1 admin admin 1,8K 24 nov. 2017 gen_node_cert_openssl.sh
-rwxr-xr-x. 1 admin admin 2,3K 24 nov. 2017 gen_client_node_cert.sh
drwxrwxr-x. 2 admin admin 49 24 nov. 2017 etc
-rwxr-xr-x. 1 admin admin 169 24 nov. 2017 clean.sh
-rwxr-xr-x. 1 admin admin 1,1K 6 janv. 19:30 example.sh.old
-rwxr-xr-x. 1 admin admin 1,1K 6 janv. 19:33 example.sh
-rwxr-xr-x. 1 admin admin 2,7K 6 janv. 19:36 gen_node_cert.sh.old
-rwxr-xr-x. 1 admin admin 2,7K 6 janv. 19:36 gen_node_cert.sh
drwxrwxr-x. 2 admin admin 6 6 janv. 19:44 crl
drwxrwxr-x. 2 admin admin 6 6 janv. 19:44 certs
drwxrwxr-x. 4 admin admin 182 6 janv. 19:44 ca
-rw-rw-r–. 1 admin admin 1,1K 6 janv. 19:44 truststore.jks
-rw-rw-r–. 1 admin admin 1,2K 6 janv. 19:45 node1.csr
-rw-rw-r–. 1 admin admin 1,6K 6 janv. 19:45 node1-signed.pem
-rw-rw-r–. 1 admin admin 4,5K 6 janv. 19:45 node1-keystore.jks
-rw-rw-r–. 1 admin admin 5,3K 6 janv. 19:45 node1-keystore.p12
-rw-rw-r–. 1 admin admin 1,9K 6 janv. 19:45 node1.key.pem
-rw-rw-r–. 1 admin admin 5,4K 6 janv. 19:45 node1.crt.pem
2.5 – now, we will copy the files that we need (node1-keystore.jks and truststore.jks) under elasticsearch_path/conf directory :
cp node1-keystore.jks /home/admin/elasticsearch/elasticsearch-6.5.4/config/
cp truststore.jks /home/admin/elasticsearch/elasticsearch-6.5.4/config/
2.6 get the OWNER :
keytool -printcert -v -file /home/admin/elasticsearch/search-guard-ssl-es-6.0.0/example-pki-scripts/admin_es-signed.pem ⇒
CN=admin_es,OU=client,O=client,L=Test,C=DE
2.7 edit elasticsearch conf file (conf/elasticsearch.yml)
# Search guard
#
searchguard.ssl.transport.keystore_type: JKS
searchguard.ssl.transport.keystore_filepath: node1-keystore.jks
searchguard.ssl.transport.keystore_password: changeit
searchguard.ssl.transport.truststore_type: JKS
searchguard.ssl.transport.truststore_filepath: truststore.jks
searchguard.ssl.transport.truststore_password: changeit
searchguard.ssl.transport.enforce_hostname_verification: false
searchguard.authcz.admin_dn:
– “CN=admin_es,OU=client,O=client,L=Test,C=DE”
xpack.security.enabled: false
2.8 – run sgadmin
searchguard stores its configuration/permissions in a specific indice in Elasticsearch. Search guard provides a file called « sgadmin.sg » that helps you change the search guard configuration or permissions without restarting your elasticsearch cluster.
You can find the « sgadmin.sh » file under « elasticsearch_path/plugins/search-guard-6/tools », for instance :
[admin@localhost tools]$ pwd
/home/admin/elasticsearch/elasticsearch-6.5.4/plugins/search-guard-6/tools
run sgadmin (here we will use keystore/truststore) :
[admin@localhost tools]$ ./sgadmin.sh -cd ../sgconfig -icl -nhnv -ts /home/admin/elasticsearch/search-guard-ssl-es-6.0.0/example-pki-scripts/truststore.jks -tspass changeit -ks /home/admin/elasticsearch/search-guard-ssl-es-6.0.0/example-pki-scripts/admin_es-keystore.jks -kspass changeit
⇒ output :
WARNING: JAVA_HOME not set, will use /usr/bin/java
Search Guard Admin v6
Will connect to localhost:9300 … done
Elasticsearch Version: 6.5.4
Search Guard Version: 6.5.4-24.0
Connected as CN=admin_es,OU=client,O=client,L=Test,C=DE
Contacting elasticsearch cluster ‘elasticsearch’ and wait for YELLOW clusterstate …
Clustername: application-mhichri
Clusterstate: GREEN
Number of nodes: 1
Number of data nodes: 1
searchguard index does not exists, attempt to create it … done (0-all replicas)
Populate config from /home/admin/elasticsearch/elasticsearch-6.5.4/plugins/search-guard-6/sgconfig
Will update ‘sg/config’ with ../sgconfig/sg_config.yml
SUCC: Configuration for ‘config’ created or updated
Will update ‘sg/roles’ with ../sgconfig/sg_roles.yml
SUCC: Configuration for ‘roles’ created or updated
Will update ‘sg/rolesmapping’ with ../sgconfig/sg_roles_mapping.yml
SUCC: Configuration for ‘rolesmapping’ created or updated
Will update ‘sg/internalusers’ with ../sgconfig/sg_internal_users.yml
SUCC: Configuration for ‘internalusers’ created or updated
Will update ‘sg/actiongroups’ with ../sgconfig/sg_action_groups.yml
SUCC: Configuration for ‘actiongroups’ created or updated
Done with success
[admin@localhost tools]$
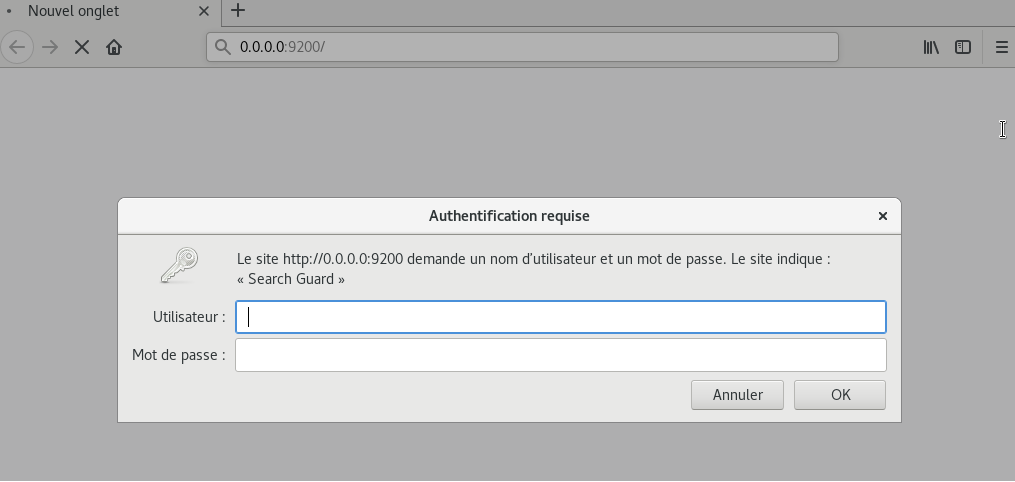
now, when you try to connect to http://localhost:9200 , an authentication window will prompt asking for a username/password.
By default, there is an admin user that already exists with these credentials :
username : admin
password : admin